Installation and Configuration
Install Apache, MySQL, and PHP
To install Apache, MySQL, and PHP on Amazon Linux 2, please refer to this link: Install LAMP on Amazon Linux 2.
Follow these steps to start using the cupid love web application on your domain.
- Extract the package and upload files from CupidLove to
/var/www/htmldirectory. - Open the URL where you have uploaded the files, for example, http://{domain}.
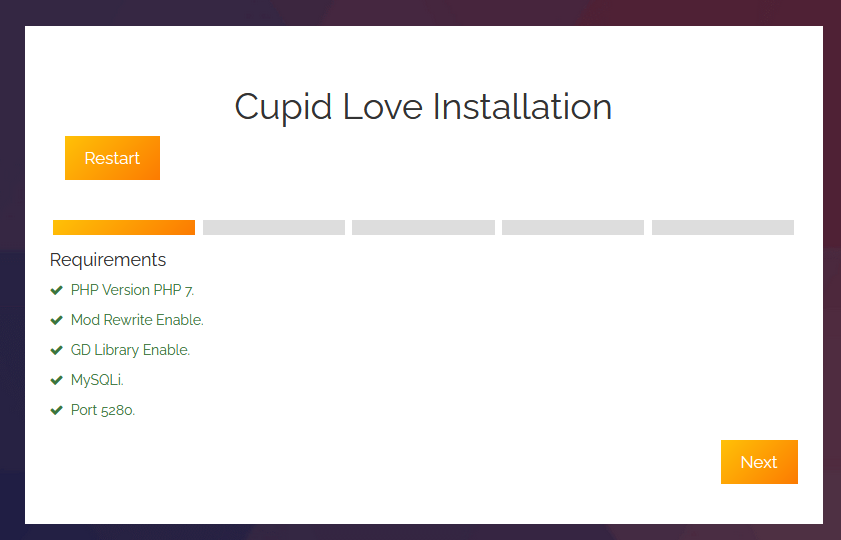
- This will take you to http://{domain}/install/index.php.
-
Make sure your configuration meets the given requirements.

-
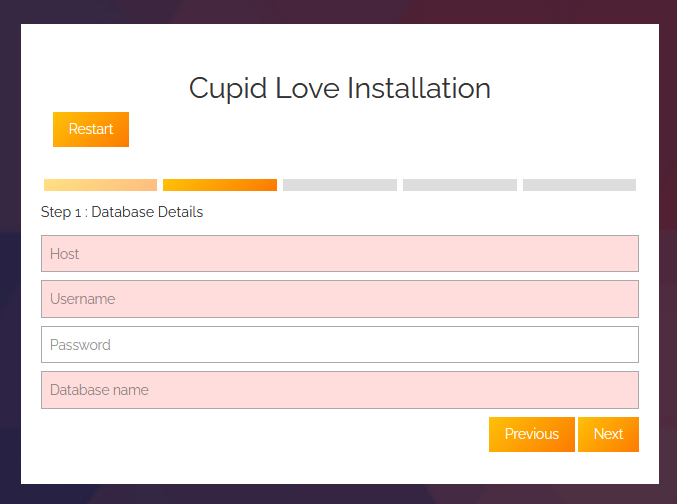
- Create a database from your server console and provide the database credentials:
- Host
- Username
- Password
- Database name
- Enter your username, password, and database name.
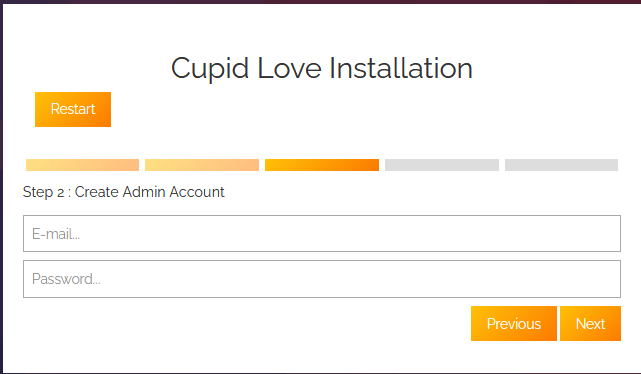
- Create an admin account to manage the admin console at http://{domain}/admin.
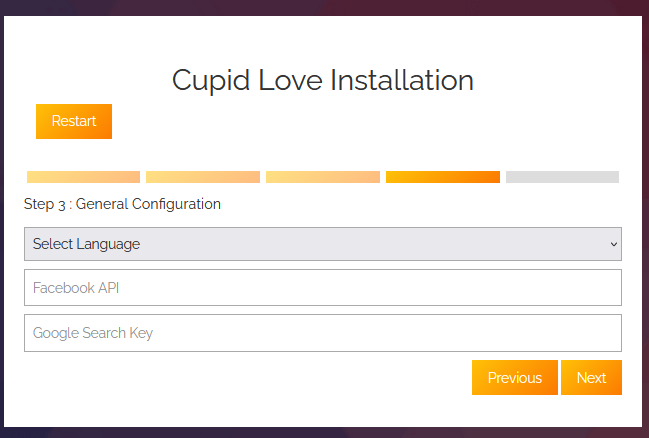
- Make configurations for your site, such as:
- Language preferences
- Facebook API integration
- Google search key
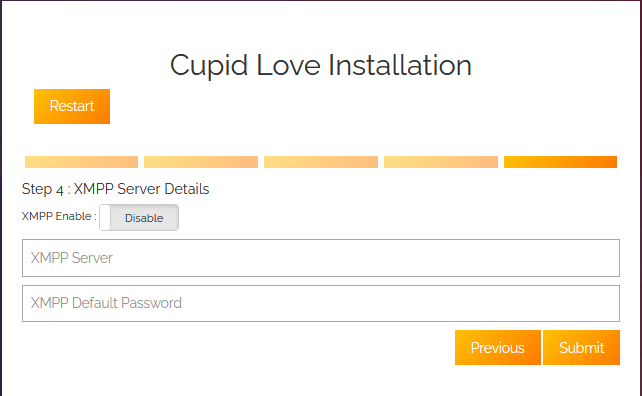
- Set up XMPP, which allows you to enable or disable the chat service.
- You are now ready to go:
- Access the admin panel at http://{domain}/admin.
- Access the frontend of your website at http://{domain}.

Install Ejabberd Server
To install the Ejabberd server on Amazon Linux 2, follow the below steps:
1. Download Ejabberd RPM Package
-
- Install Development tools on Amazon Linux 2 server:
$ sudo yum groupinstall -y "Development Tools"
-
- The Ejabberd package is provided by RPM-based Linux operating systems.
$ EJ_VERSION=23.04
$ wget https://static.process-one.net/ejabberd/downloads/${EJ_VERSION}/ejabberd-${EJ_VERSION}-1.x86_64.rpm
2. Install Ejabberd on Amazon Linux 2.
-
- The package has been downloaded; let’s install it using the following commands:
$ sudo yum localinstall ejabberd-${EJ_VERSION}-1.x86_64.rpm
-
- The init script is placed in the /etc/init.d directory.
$ ls /etc/init.d/ejabberd
/etc/init.d/ejabberd
-
- Ejabberd’s application directory is:
$ ls /opt/ejabberd
conf database logs
3. Start the Ejabberd systemd service on Amazon Linux 2.
-
- Copy the systemd unit file of Ejabberd to the /etc/systemd/system directory:
$ sudo cp $(sudo find / -name ejabberd.service) /etc/systemd/system
-
- Reload systemd
$ sudo systemctl daemon-reload
-
- Start the service and enable it to start on boot.
$ sudo systemctl start ejabberd
$ sudo systemctl enable ejabberd
-
- Check to confirm the service was started successfully.
$ systemctl status ejabberd
4. Add the ejabberdctl command location to your PATH.
-
- Locate the ejabberdctl binary file:
$ sudo find / -name ejabberdctl
/opt/ejabberd-23.04/bin/ejabberdctl
-
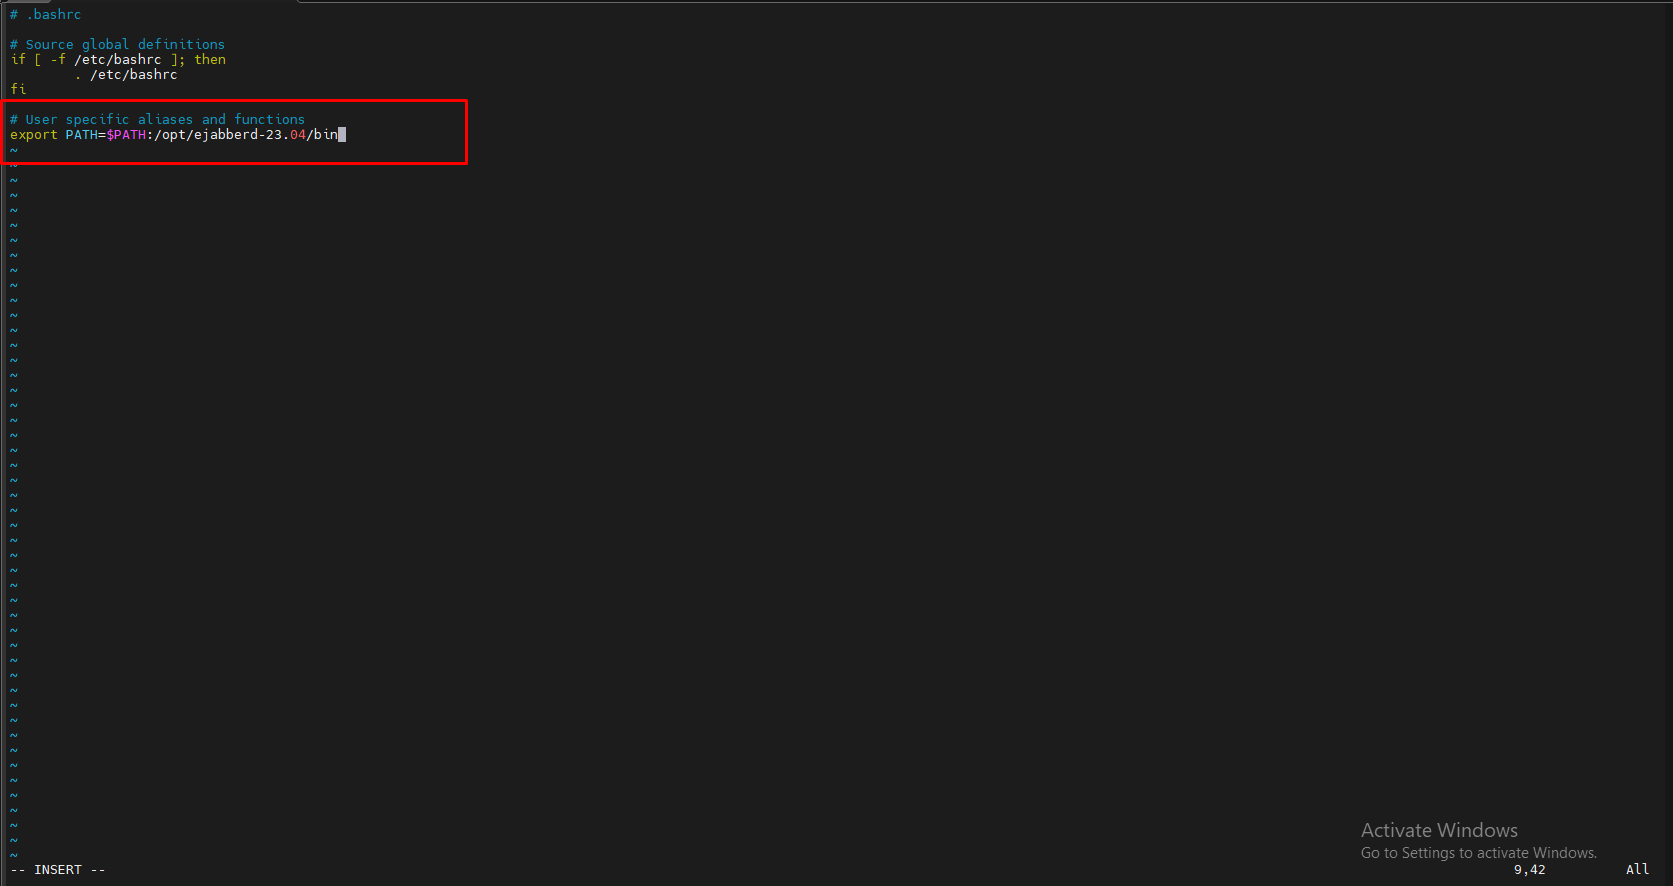
- Add the path to your .bashrc file.
$ vi ~/.bashrc
-
- Update PATH
export PATH=$PATH:/opt/ejabberd-23.04/bin
-
- Source your bashrc file to update settings.
$ source ~/.bashrc
5. Add an Admin user to Ejabberd
-
- Once Ejabberd is installed and configured, you’ll need to add an initial admin user for administrative purposes.
# ejabberdctl register myadmin $(hostname) StrongAdminPassword
Where:
-
-
- myadmin – Is the name of the admin user to be created.
- StrongAdminPassword is the password for the myadmin user created.
-
Expected command execution output:
User myadmin@amazon-linux successfully registered
You can now edit the Ejabberd configuration file and give the user we just added administration rights to the XMPP account.
The user syntax is:
"username@servername" or username@hostname
eg: admin@amazon-linux
Get your machine hostname:
$ hostname
amazon-linux
-
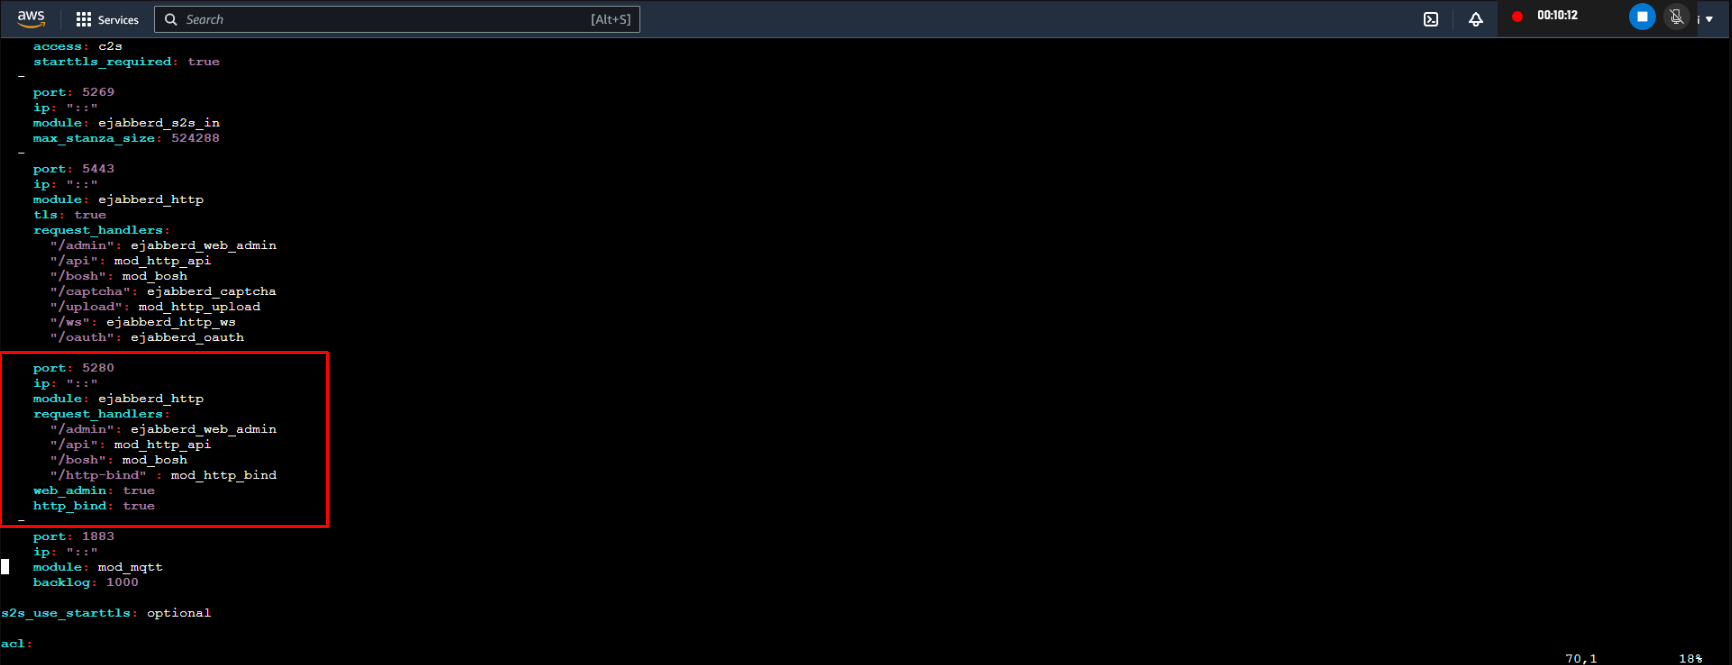
- Edit the Ejabberd configuration acl section:
$ sudo vi /opt/ejabberd/conf/ejabberd.yml
port: 5280
ip: "::"
module: ejabberd_http
request_handlers:
  "/admin": ejabberd_web_admin
  "/api": mod_http_api
  "/bosh": mod_bosh
  "/http-bind" : mod_http_bind
web_admin: true
http_bind: true
-
- Restart the Ejabberd service after making the changes.
$ sudo systemctl restart ejabberd
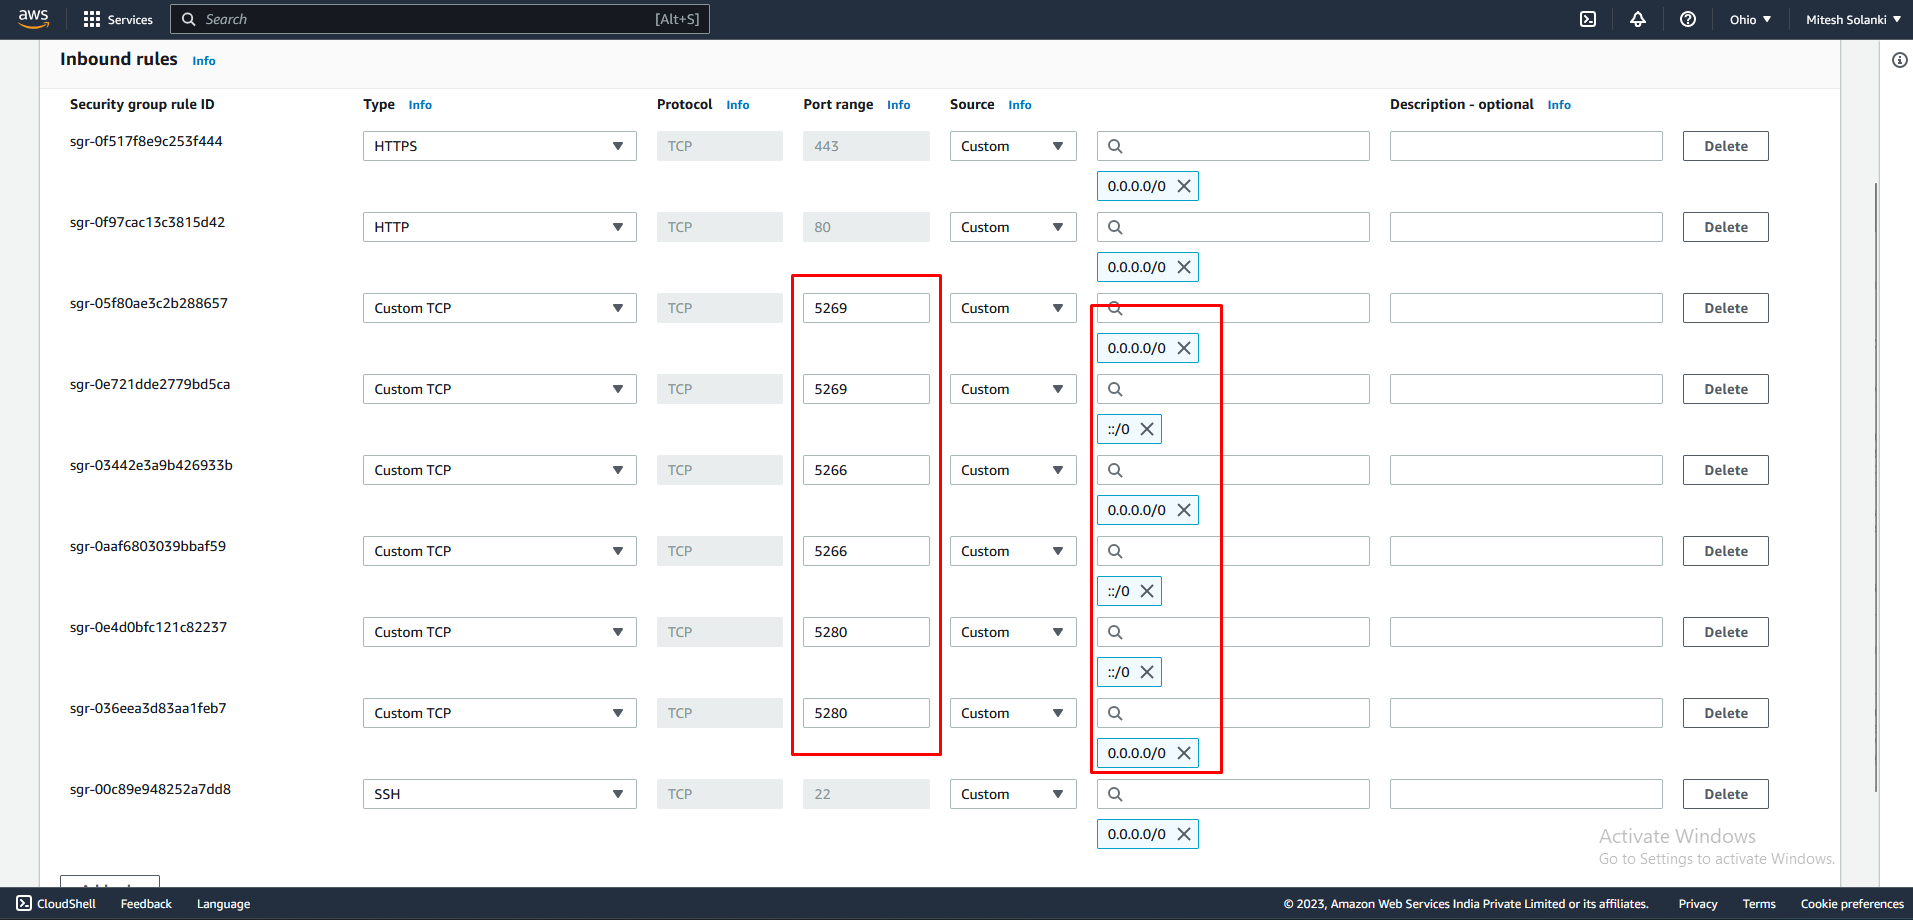
6. Make sure to open ports 5266, 5280, and 5269 for the Ejabberd server on the AWS instance.
-
- Sign in to the AWS Management Console and open the Amazon EC2 service.
- Navigate to the “Instances” section and select the instance to which you want to add ports.
- Open your instance by clicking on the instance ID.
- Go to the security tab and click on Security Group ID.
- Click on Edit inbound rules and start adding rules.
Add the following ports shown below:
5280, 5266 and 5269.
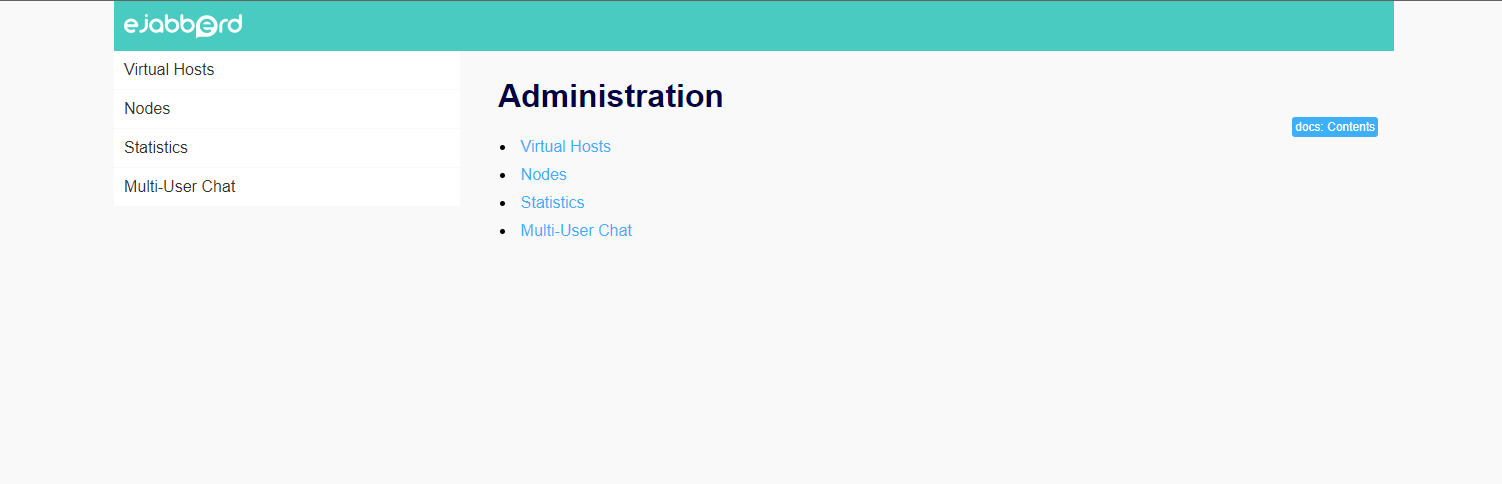
7. Access ejabberd Web Admin
-
- Ejabberd admin console can be accessed on below URL:
http://[server_ip_address_or_hostname]:5280/admin/
-
- Login with the username and password as created earlier.
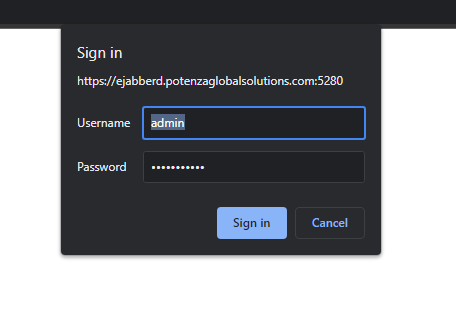
-
- On successful authentication you’ll be presented with Ejabberd admin console.