1. Introduction
  2. Getting Started
    1. Requirements
    2. WordPress Installation
    3. Theme Installation
      1. Through "Envato Market"
      2. Through WordPress
      3. Through FTP Upload
    4. Theme Setup Wizard
    5. Child Theme
    6. Sample Data
  3. Theme/Plugin Update
  4. Theme Options
    1. Layout Settings
    2. Site Logo
    3. Sticky Header
    4. Site Preloader Option
    5. Back to Top
    6. Header
      1. Site Header
      2. Topbar
      3. Search
    7. Page Header
    8. Page Settings
    9. Footer
    10. Blog/Post Settings
      1. Blog Settings
      2. Archive Settings
      3. Single Post
    11. Portfolio
    12. Color Scheme
    13. WooCommerce
      1. Products Listing
      2. Products Filters
      3. Single Product
      4. Checkout
      5. Wishlist
      6. Compare
      7. Quick View
      8. My Account
      9. Cookie Law Info
      10. Swatch Settings
      11. Promo Popup
    14. Faq Settings
    15. Site Info
      1. Social Profiles
      2. Site Contacts
      3. Opening Hours
    16. Social Sharing
    17. Typography
    18. 404 Page
    19. Performance
    20. Maintenance
    21. Custom CSS/JS
    22. MailChimp Settings
  5. Elementor Widget/WPBakery Shortcodes
    1. Address Block
    2. Banner
    3. Button
    4. Callout
    5. Category Box
    6. Clients Logo
    7. Countdown
    8. Counter
    9. Hotspot Image
    10. Static Block
    11. Image Slider
    12. Image Gallery
    13. Info Box
    14. Info Box 2
    15. Instagram (Shortcode)
    16. Kite Box
    17. List
    18. Menu List
    19. Multi Tab Product Listing
    20. Newsletter
    21. Opening Hours
    22. Portfolio
    23. Pricing Box
    24. Product Category Item
    25. Product Deal
    26. Product Deals
    27. Product Showcase
    28. Products Listing
    29. Progress Bar
    30. Recent Posts
    31. Search
    32. Section Title
    33. Single Product Slider
    34. Smart Image View
    35. Social Icons
    36. Team Members
    37. Timeline
    38. Testimonials
    39. Vertical Menu
    40. Video
  6. Videos
    1. WooCommerce
      1. Installing WooCommerce
      2. General Settings
      3. Products Settings
      4. Tax Settings
      5. Tax Rate Example
      6. Shipping Zones
      7. Flat Rate
      8. Free Shipping
      9. Local Pickup
      10. Shipping Options
      11. Shipping Classes
      12. Checkout Settings
      13. BACS
      14. Check Payments
      15. Cash On Delivery
      16. PayPal Standard
      17. Accounts Settings
      18. Emails Settings
      19. API Settings
      20. Product Categories, Tags, & Attributes
      21. Simple Product Overview
      22. Grouped Product Overview
      23. External/Affiliate Product Overview
      24. Variable Product Overview
      25. Downloadable Product Overview
      26. Coupons
      27. Widgets
      28. Shortcodes
      29. Managing Orders
      30. Refunding Orders
      31. Reporting
      32. System Status
  7. Widgtes
  8. Translation
    1. Poedit
    2. Loco Translate
    3. WPML
  9. Extra
    1. Retina Display
    2. Browser Support
    3. How to rate this item
    4. Speed Optimization/Performance
    5. WooCommerce / Shop integration
    6. Plugins Documentation
      1. WPBakery Page Builder
      2. WooCommerce
      3. Dokan Multivendor Marketplace
      4. WC Marketplace
  10. Additional
    1. Header Builder
    2. Custom Sidebar Widget
    3. Mega Menu
    4. Footer Builder
    5. Instagram API Settings
    6. Size Guide
    7. Static Block
    8. Product Variation Not Working Proper
  11. FAQs
    1. Why Sample Data Look Different than Demo Pages?
  12. Changelog
  13. Source & Credits

Speed Optimization/Performance


The two factors involved in reducing load time of site are as below:

1. Limiting the scripts to minimum number of files as possible.

WordPress sites are especially susceptible to loading many scripts upon page load. This is because plugins and themes generally have their own scripts that need to be loaded in order to function. In some websites, developers would manually combine them to reduce the overhead upon page load.

2. Deferring the loading of “non-critical” scripts.

It includes moving scripts to the bottom of the page. When a browser is loading your page, it typically loads things in parallel until it encounters a script. And while working on a script browser load only scripts nothing else. Once the script is loaded, the website can continue rendering everything else. You can see how, especially if you have many scripts, this can affect your page load time.

Steps to Resolve the “Render-blocking JavaScript and CSS” PageSpeed Error:

Step 1. Resolve any render-blocking plugin scripts by adjusting plugin settings, if possible.

Google PageSpeed help you to determine which render-blocking scripts coming from a plugin you need to adjust. If you are able to identify any plugins from the list of scripts, go to each plugin’s settings, one by one, and search for a setting that will defer the JavaScript or load it asynchronously. If you are unable to identify any plugins from the list of scripts, or if you do not have any of these plugin settings available to you, continue on to step 2.

Revolution Slider settings :

Do the following :

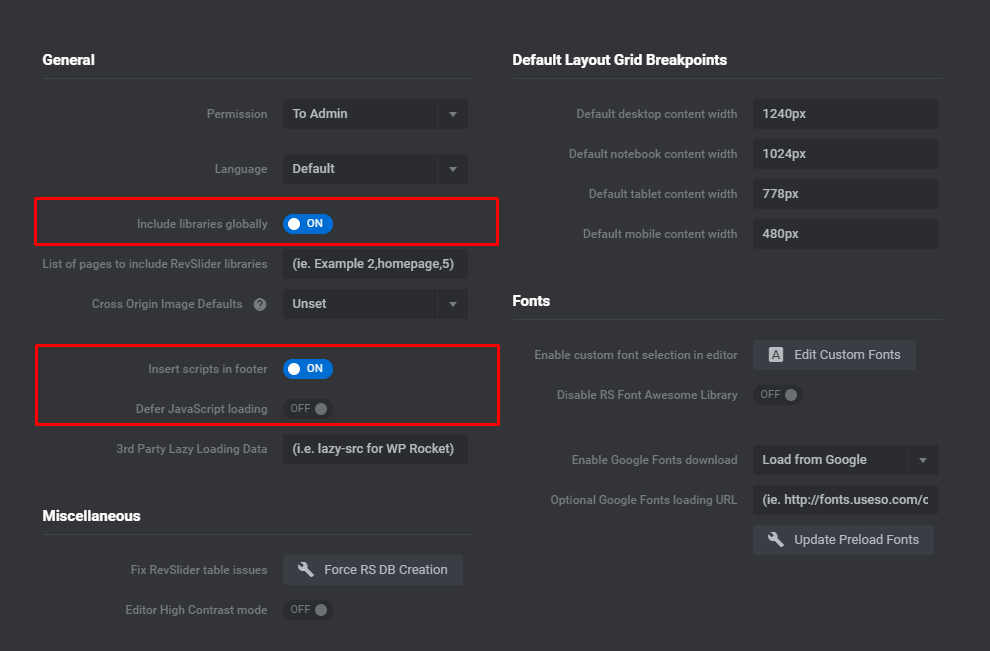
1. Revolution Slider “Global Settings”:
– Include RevSlider libraries globally: ON.
– Insert JavaScript Into Footer: ON
– Defer JavaScript Loading: OFF.

2. After changing individual plugin settings, clear your cache and test properly.

3. Check PageSpeed insights. Making these changes to Slider Revolution helped reduce the number of render-blocking scripts your site had, but you still need help from other plugins to clean up everything else.


Step 2. Resolve the CSS file from render-blocking

Install the “Autoptimize” plugin and check the following settings:

    • Enable Optimize HTML code
    • Enable Optimize JavaScript code
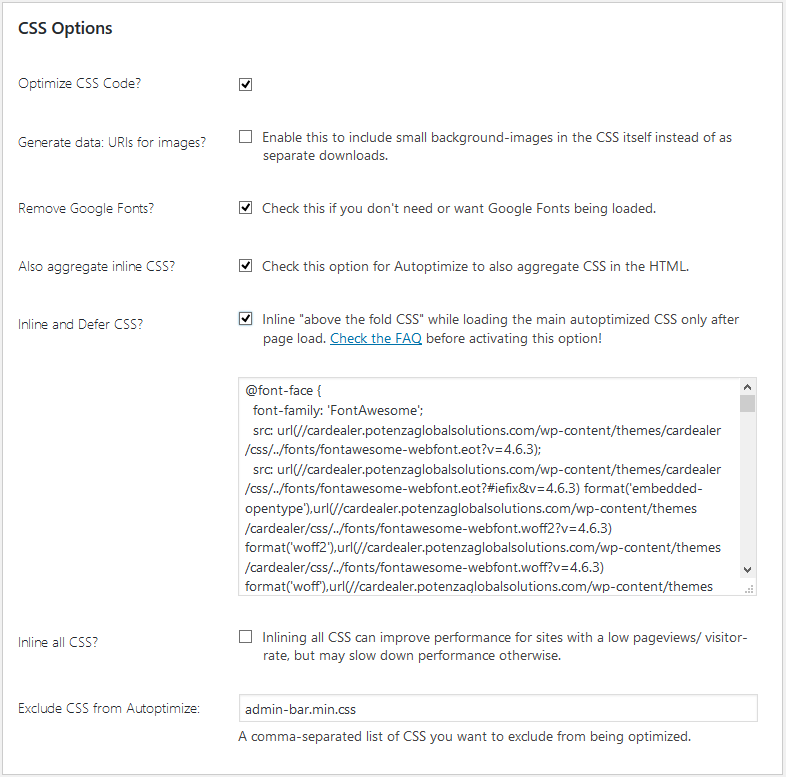
    • Enable Optimize CSS Code
      • “Inline and Defer CSS”

These options help you to place “above the fold” CSS in the header so it is loaded first before loading the rest of the CSS script. This allows the above-the-fold content styling to load first so it will be rendered as quickly as possible for the visitor.

Following guide will help you to enable these options.

I. IDENTIFY All of Your Site’s CSS.

A.) Open Autoptimze (Settings –> Autoptimze), and tick the “Inline All CSS?, Remove Google Fonts? and Also aggregate inline CSS?” option (click all images below for a larger view):

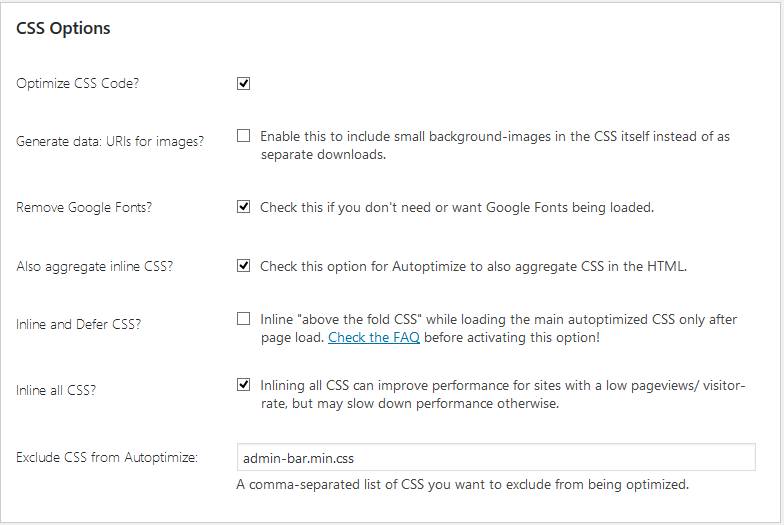
B.) Then, click “Save Settings and Empty Cache” at the bottom of your Autoptimize dashboard.

C.) In another browser tab with an empty cache, open your homepage’s source code (right click –> open source).

D.) Your HTML will (likely) be huge now. Copy everything between the <style type=”text/css” media=”all”> and ending </style> tags.

II. EXTRACT the Critical CSS.

A.) Open this Critical Path CSS Generator and enter your site’s homepage URL into the field under #1 (“URL”).

B.) Paste the code you copied from your source into the field under #2 (Full CSS).

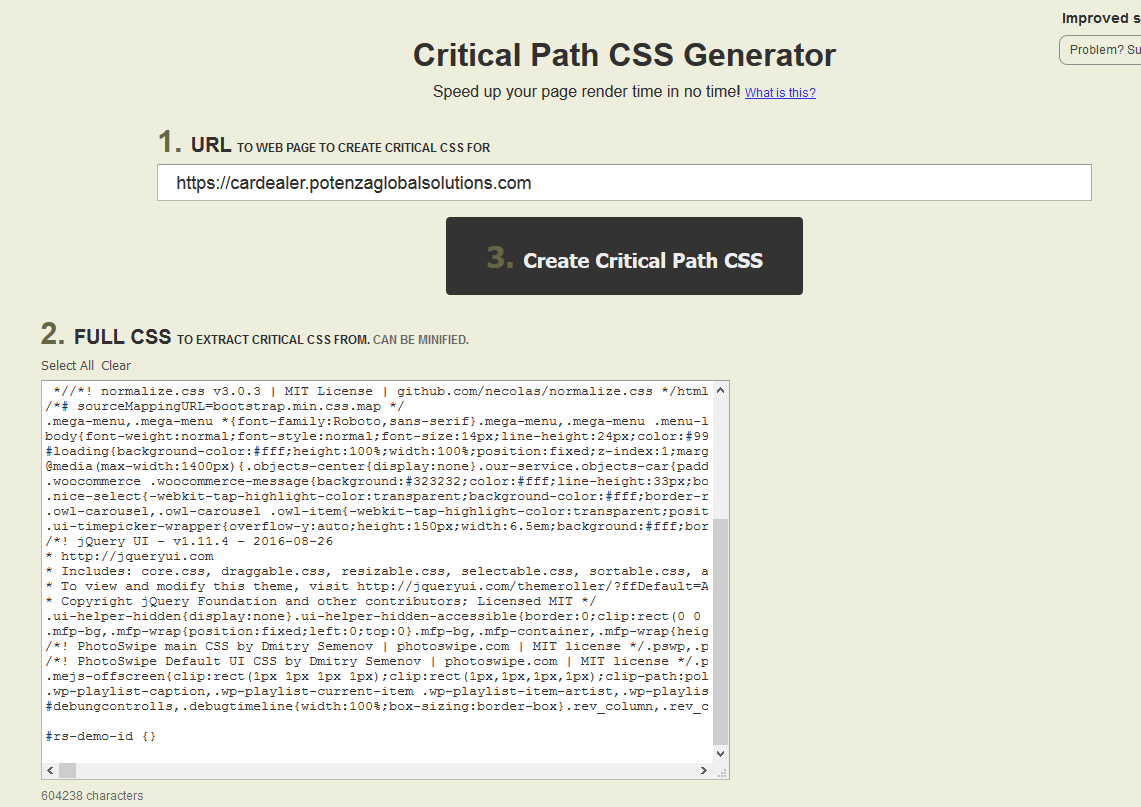
C.) Click the ‘Create Critical Path CSS’ button, and you’ll get something like:

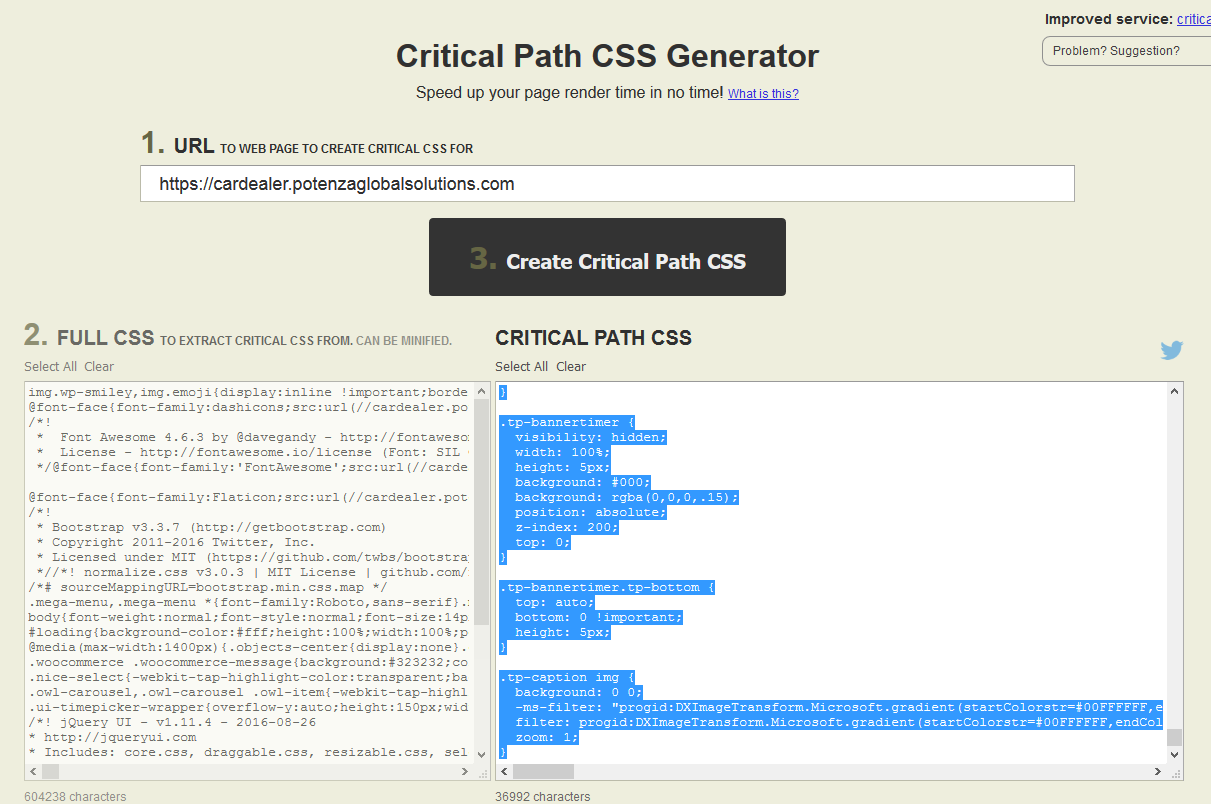
D.) Copy the generated CSS code.

III. APPLY Critical CSS.

A.) Go back into Autoptimize, and tick the “Inline and Defer CSS?” option.

B.) Enter the code you copied from the Critical Path CSS Generator into the field under the Inline and Defer CSS option box. Like:

C.) Click “Save settings and Empty Cache” at the bottom of your Autoptimize dashboard.

And that’s it! You’re good to go.

Suggest Edit