1. Introduction
  2. Installation
    1. Getting Started
    2. Plugin Update (CiyaShop App Version 2.0)
    3. Plugin Installation (CiyaShop App Version 2.0)
  3. API Settings
    1. Support & License
    2. API Keys
    3. WooCommerce API
    4. Android Application Configuration
    5. iOS Application Configuration
    6. Google Maps API
    7. App URL
    8. Test API
    9. Emails
    10. Vendor Settings
  4. App Settings
    1. Primary Logo
    2. Secondary Logo
    3. App Color
    4. Main Category Menu
    5. Home Slider Banner
    6. Category Banners
    7. Banner Ads
    8. Feature Box
    9. App Pages
    10. Checkout Page Settings
    11. Social Links
    12. Contact Info
    13. Home Page Customisation
    14. WhatsApp Chat
    15. Language Setting (Version 1.0, Version 1.1& Version 1.2)
  5. Performance
  6. Reward Points
  7. Multi-Vendor Support
  8. Push Notifications
    1. Android Push-notification configurations
    2. iOS Push-notification configurations
    3. Admin Push-notification Configuration
  9. Delivery Tracking
  10. In-App Coupons
  11. Scratch Cards
  12. Multi-Currency Symbol
  13. GEO Fencing
  14. WishList
  15. One Signal Notification
  16. WPML Configuration
    1. App Setting for WPML
  17. How To Enable Delivery Boy? (Coming Soon)
  18. Other Android Application Configuration steps
    1. Application Package
    2. Setup Firebase project
    3. Setup Facebook Login
    4. Change SplashScreen
    5. Source and Credits
  19. Other iOS Application Configuration steps
    1. Setup Firebase project
    2. Facebook Setup
    3. Change App Name
    4. Change App Icon
    5. Change SplashScreen
    6. Source and Credits
  20. WhatsApp Floating Button
  21. Facebook Pixel
  22. Firebase Deep Links
  23. Google App Indexing
  24. Bottom Bar in Android
  25. Social Sharing & App Sharing (Coming Soon)
  26. Video Support (Product Detail)
  27. Infinite Scrolling
  28. Introduction Slider Changes
  29. Manage Infinite scrolling configuration from code
    1. Android
    2. iOS
  30. Variation Option
    1. Android Product Variation
    2. iOS Product Variation
  31. Check Zipcode For Delivery
  32. Add To Cart In Listing Page
  33. Firebase OTP on Registration
  34. Custom Products (Selected Products)
  35. Loader options (Shimmer Loader)
  36. Tera Wallet Plugin(Coming Soon)
  37. Publish
    1. Android app submission on PlayStore
    2. iOS app submission on AppStore
  38. FAQs
    1. WhatsApp not opening In API 30(Android 11)
    2. HTTP Authorization Header not enable?
    3. Checkout page not working correctly?
    4. Special Deal Products or Schedule Sale Products
    5. Update PGS Woo Api plugin
    6. How to take backups of PGS WOO APi Plugin
    7. How to remove Geo-fencing from CiyaShop Android?
    8. Remove Social Media Login
    9. Remove Black Color From Color Filter
    10. Set image according to your requirement
    11. Downloadable Products
    12. Remove Intro Slider (Coming Soon)
    13. InternalAppEventsLogger : Error When Running Android App
    14. Bottambar Issue
    15. Remove Blog and Find store
  39. Change Log
    1. Android
    2. iOS

iOS Push-notification configurations

Register your app to receive notification:

A) Your app must be an Explicit App Id, to support Push Notification.

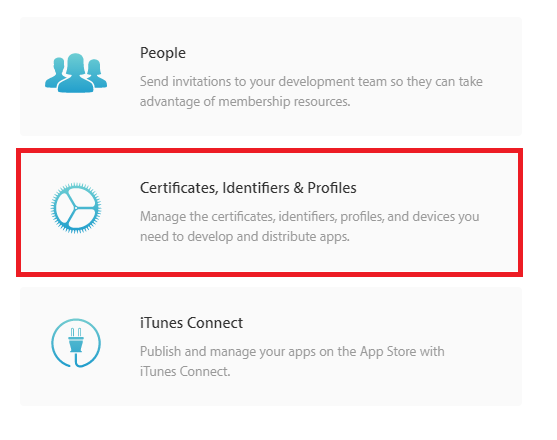
  1. Navigate to the Apple Developer Member Center website, and click on Certificates, Identifiers & Profiles.
2. Select an Identifier from the iOS Apps section.

  1. You will see a list of your App IDs. Click on the + button.
  1. Enter a name for your new App ID under App Id Description, choose an App ID Prefix, and under App  ID Suffix, select Explicit App ID, enter your iOS app’s Bundle ID, it should match the Bundle identifier in your Xcode project configuration and, add in the Info.plist.
  1. Enable Push Notification under App Services. Enable other services that your app will need.
  1. Click on “Continue”, check that al values entered were correct. Click on “Submit”.

B)  Now you have created the App ID; you need to configure the App ID for Push Notification.

  • Select your new App ID and click on “Edit”.
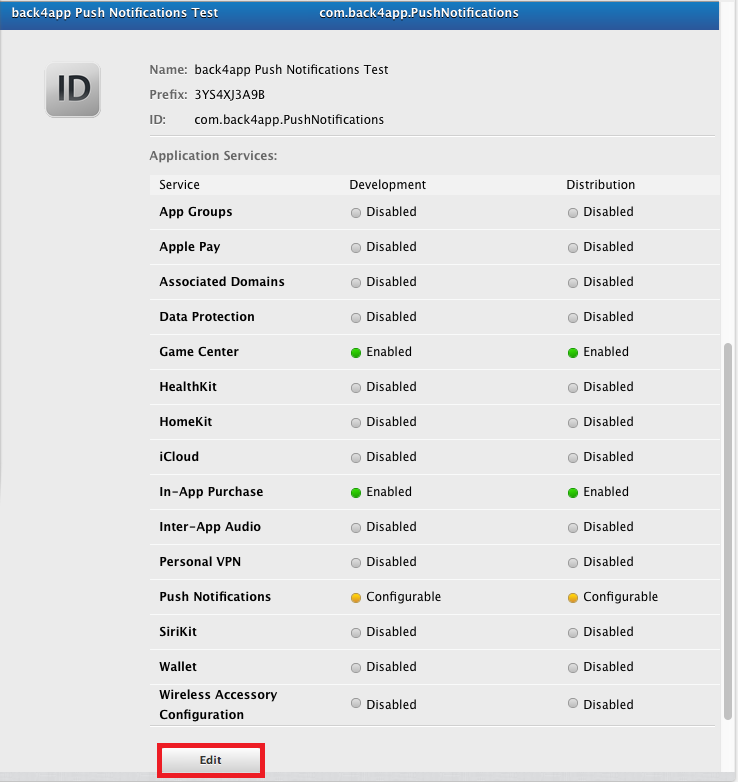
  • Scroll down to the Push Notifications section, click on “Create Certificate” under “Development SSL Certificate”.
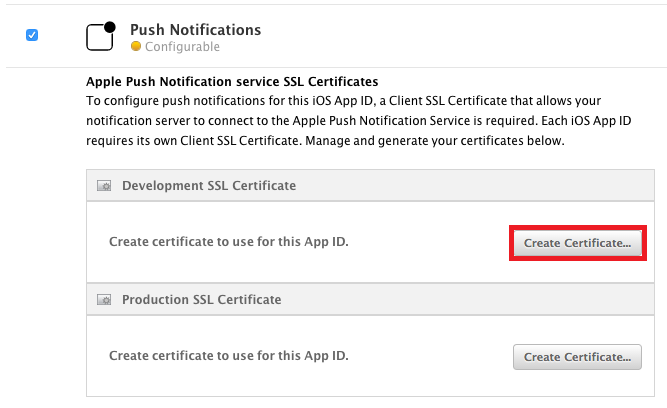
  • Follow instructions on the next screen to create a Certificate Signing Request (CSR) using the Keychain Access utility on your Mac; this is needed to authenticate the creation of the SSL certificate.
  • Upload the CSR to Apple’s servers, and then click on “Generate”.
  • Add the certificate to your login keychain.
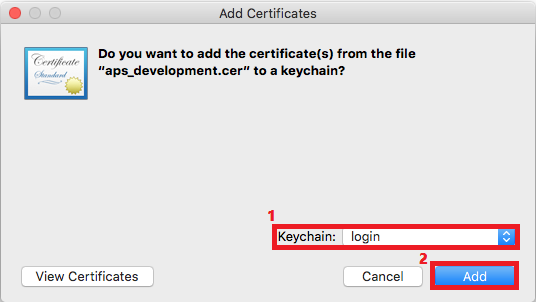
  • Open the Keychain Access utility. Locate the certificate under “My Certificates”. It should be called “Apple Development Push Services”. Right-click on it, select “Export” and save it as a .p12 file. Do not enter an export password when prompted!

  1. C) You will need to repeat the process to make the Production SSL Certificate.

Now we need to configure the Xcode project.

  1. Go to your project’s Capabilities page, then turn On Push Notifications. If any issues require your attention, Xcode will let you know.
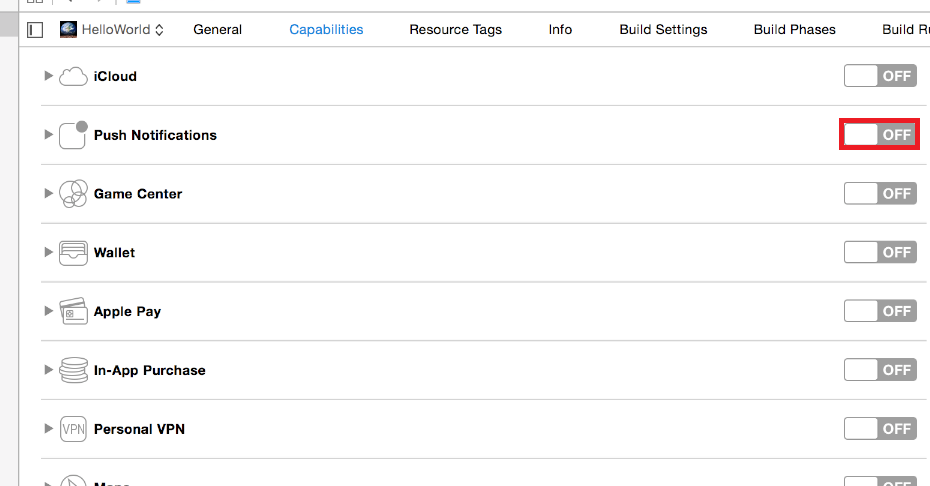
to the Generate page. Modify the Bundle Identifier to match your App ID’s Bundle Identifier.

For more details documentation on Push notification click here.

Suggest Edit